Splatter Paint Coloring Tutorial
Here is a technique that has gotten some attention from others who have seen this image. I saw a similar image on Pinterest, and wanted to emulate it. This was a trial and error attempt that seems to have worked. I am no Photoshop Guru by any means. I make no claims that this is the only way to accomplish this style, nor that it is the best way. But it worked for me. I hope it helps you too.
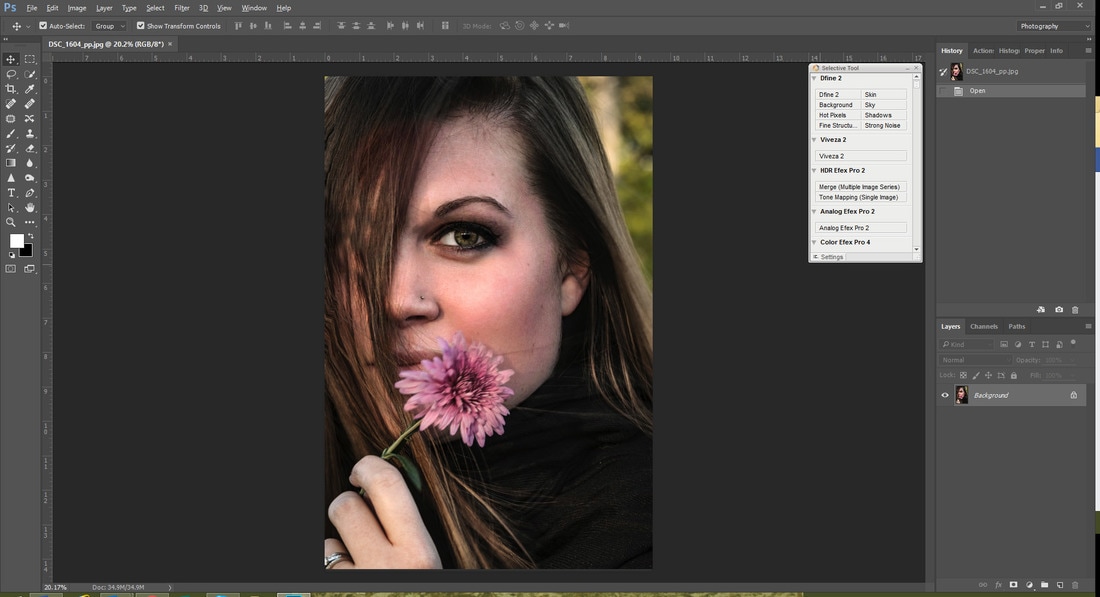 Step 1: Complete the edits to the original color version of an image.

Step 2: Create a black and white version of your image. I used NIK Silver Efex 2.
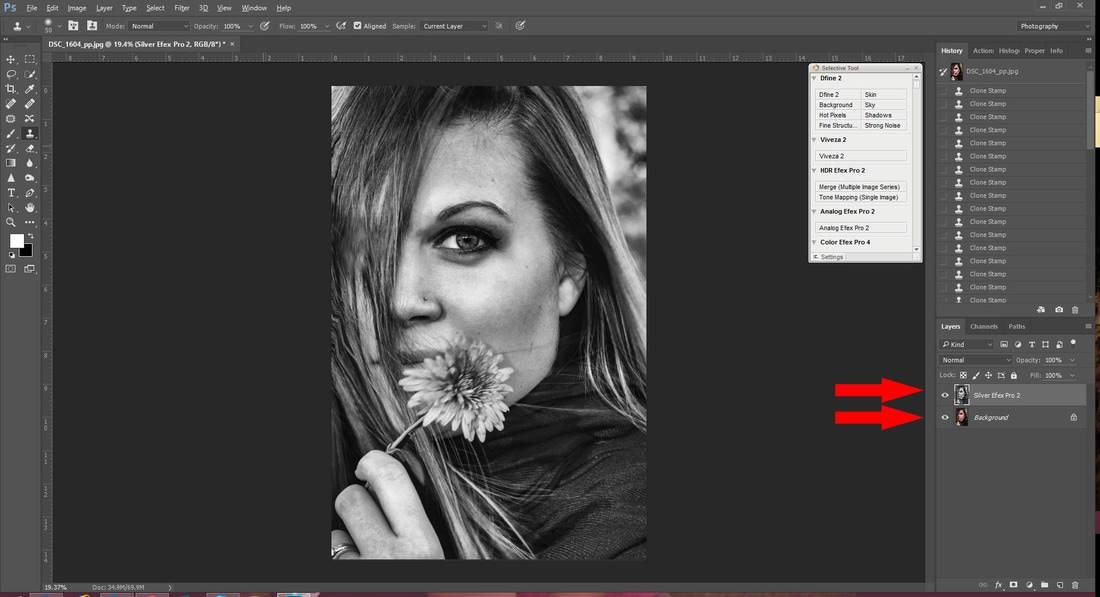
Step 3: Stack the two versions of the image in the layers pallet.
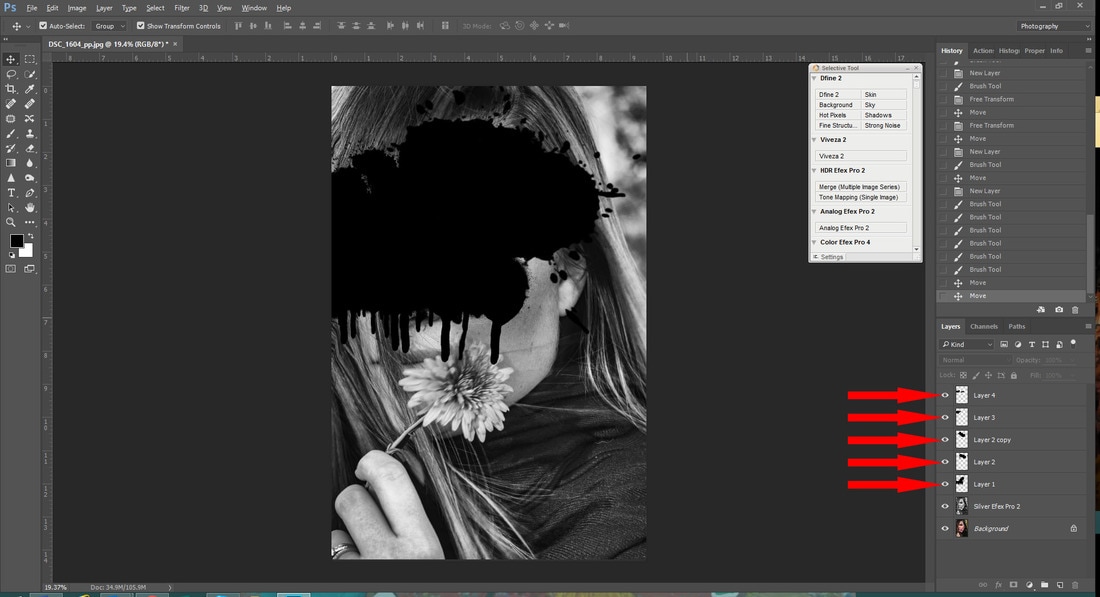
Step 4: Create a new layer on top of the stack, and begin painting in with your splatter brushes and custom shapes. (I put each shape on a separate layer so that I could move the splotches independently, but you could put them all on one layer.)
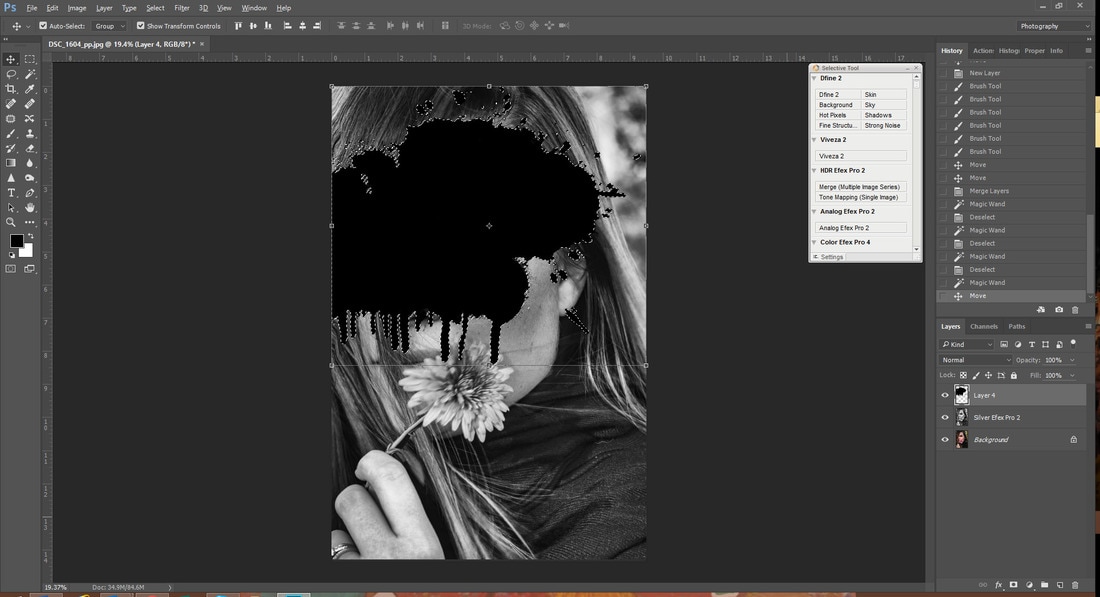
Step 5: Merge the splotches layers to one, and make a selection. I use the Magic Wand tool with a tolerance set to 1 to get a clean selection.
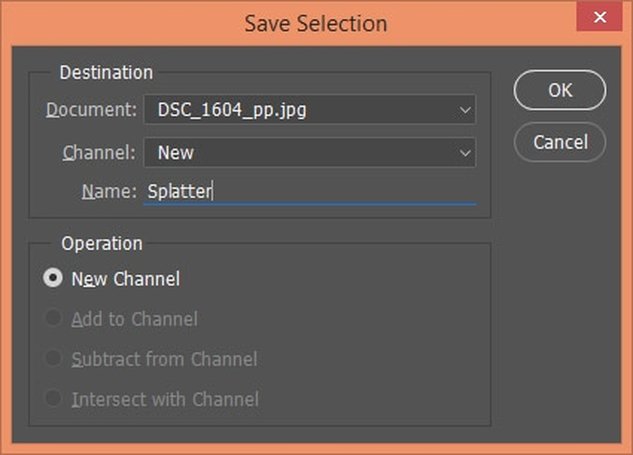
Step 6: Save the selection. If you're not familiar with this, go to Selection>Save Selection. Give the Selection a name.
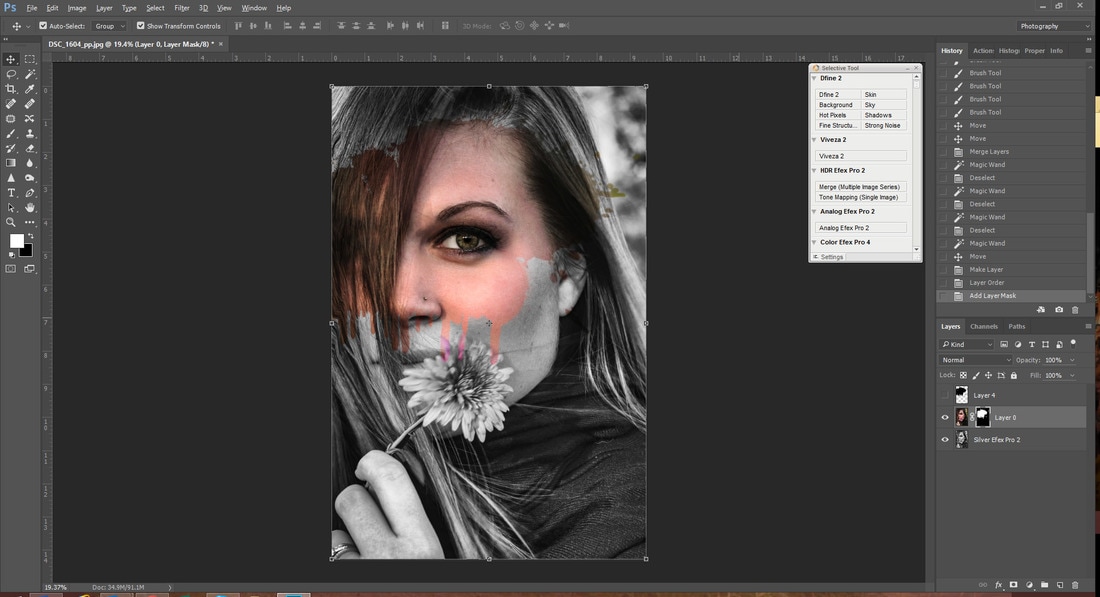 Step 7: Hide the splotches layer. I had to do a little footwork now. I created a new layer from the background layer, and then moved the color layer on top of the Black and White. Then select the color layer and load the Splatter selection (again Selection> Load Selection). Finally, hit the Layer Mask button (the half moon icon on the bottom of the layer pallet).
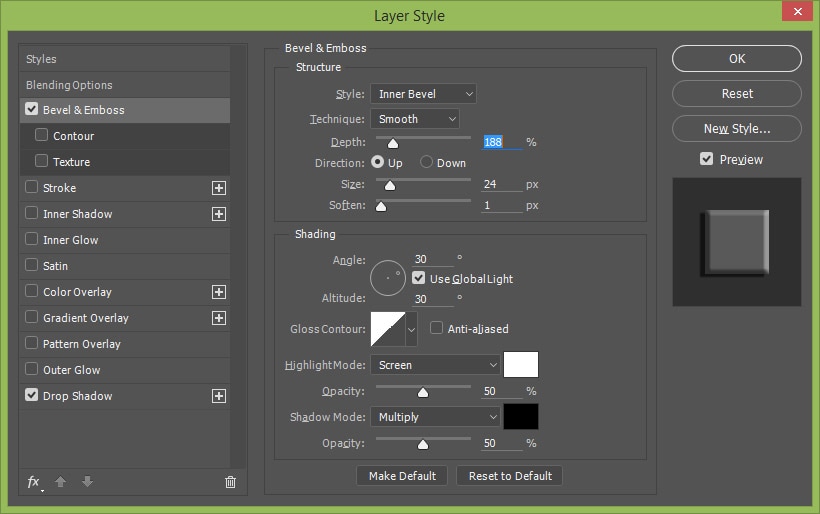
Step 8: Click on the fx button on the bottom of the layer stack, and add a Bevel and Emboss and a Drop Shadow. Use whatever settings work for your image.
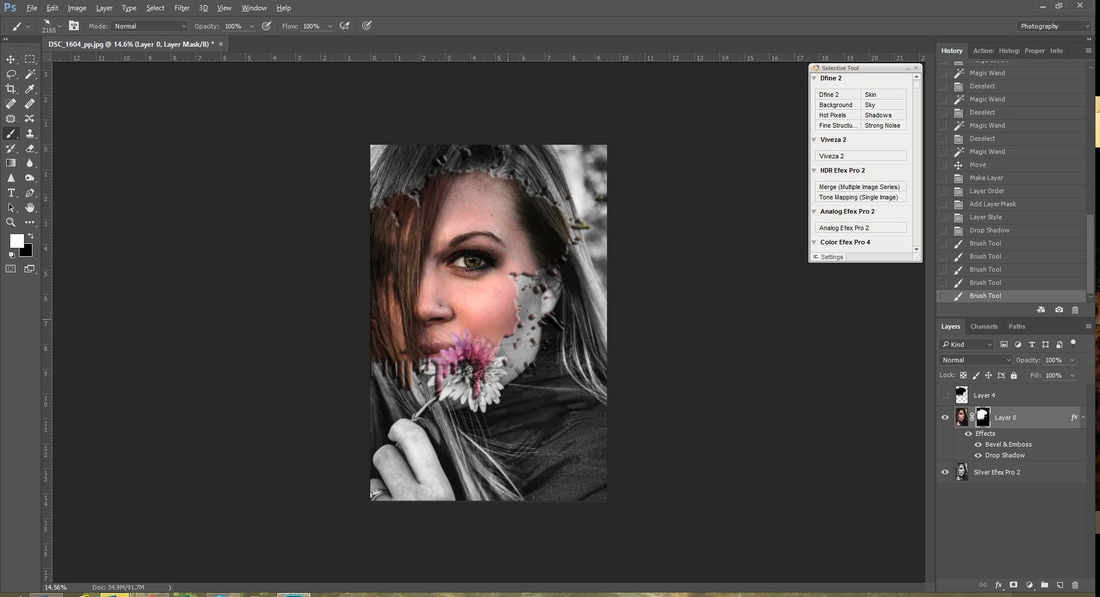
Step 9: If you don't like the exact splatter pattern, you can still edit it. Click on the Layer Mask, set your foreground color to White and use your paintbrush to paint in the color. The additions will still have the Bevel and Emboss and the Drop Shadow already applied as you paint.

